Report Distribution
Report Distribution Methods
Reports written for diagnostic studies on OnePacs may be distributed through a variety of means:
- Referring physicians or other users may log on to the OnePacs system and review reports online
- Reports may be sent via fax
- Either full-text reports, or HIPAA-compliant web links (URLs) to open reports in a web browser, may be transmitted via email
- HL-7 integration is also available as a paid feature
- Reports also may be saved in PDF or word processor-compatible (RTF) format
Report templates
Report templates allow users with the "Manage report destinations and templates" permission to define the layout and appearance of diagnostic imaging reports, and to decide what information should be included in the reports. The report templates determine how reports will appear when displayed in a web browser, when transmitted by facsimile, or when saved as PDF or RTF. The pre-defined sample templates which are available on establishment of the OnePacs accounts are useful examples of general template structure. The sample templates contain the most commonly desired information in the report header section and include four key images.
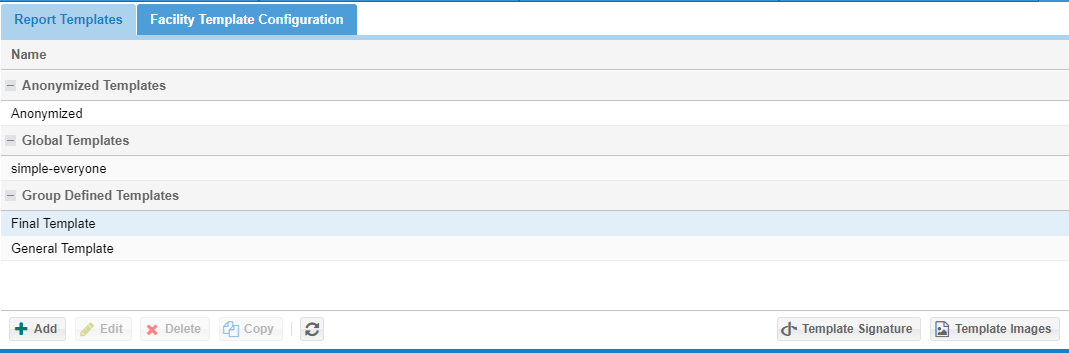
Templates can be edited through the Report Templates option in the Admin menu. Select the Admin menu, then select Report Templates. There are two types of templates: those which are available for all facilities within your OnePacs accounts, and those which are only applicable for specific facilities.
To create or edit templates, select the “Templates” tab. To select which templates will be used for particular facilities use the “Facility templates Configuration” tab.
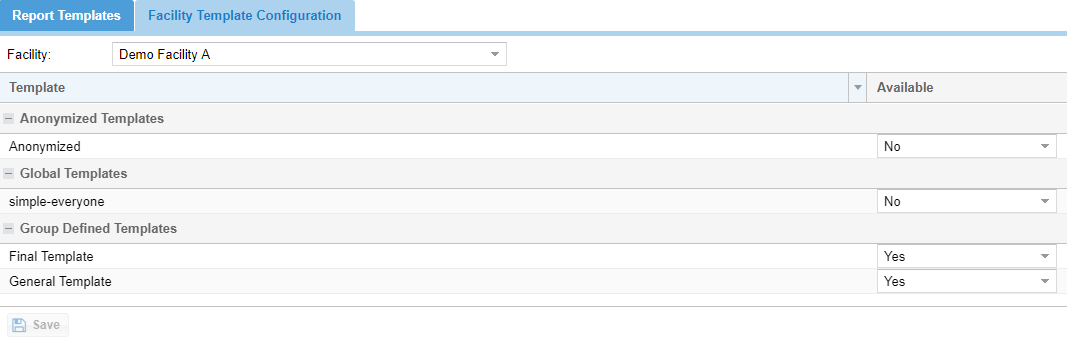
The second tab, “Facility template configuration”, determines which templates will be available for each facility. First, select a facility and then click on the yes and no to modify whether the report template is available for the selected facility. The default templates are configured under the facility settings.
Managing report templates
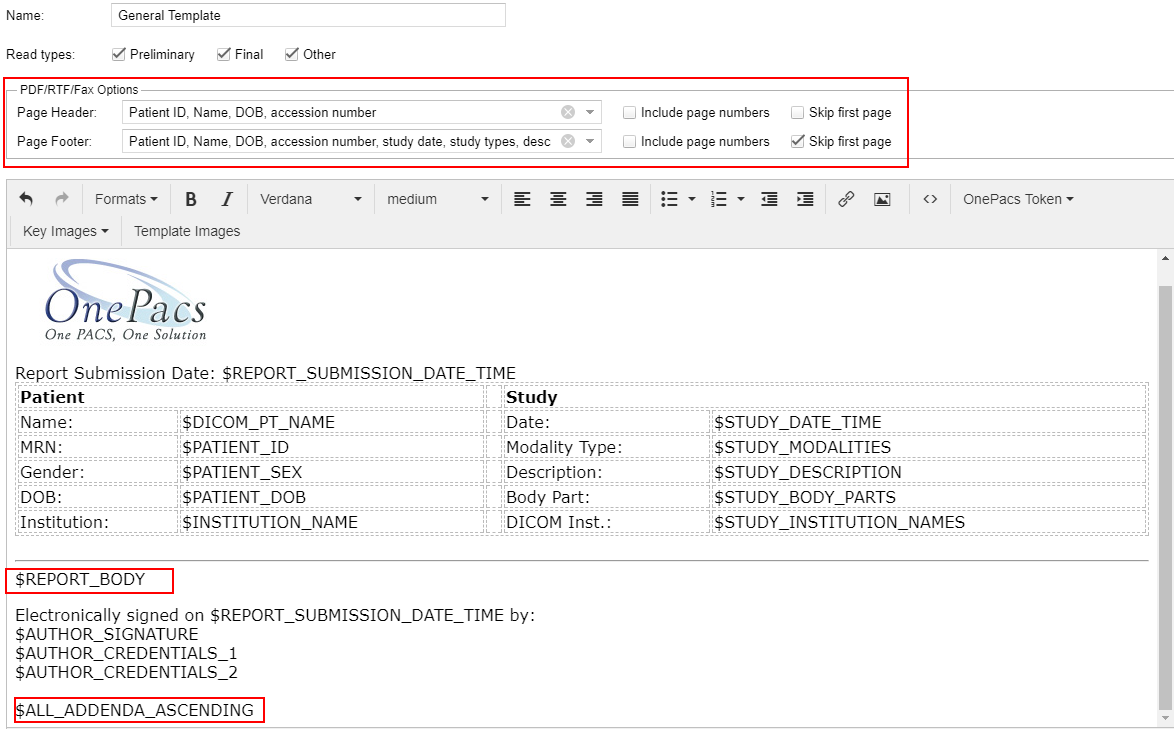
A user can add, edit, delete or copy a report template. When editing a report template the user is shown various tools to structure a report. Tables can be used to space and organize the data. Fonts can be modified to customize the look of the report. Various "OnePacs Tokens" can be selected to customize what data will be displayed on the report. A header, footer, and page numbers can be configured for faxes and reports that are exported to PDF/RTF.
The "OnePacs Tokens" will be replaced with the data from the case that was reported. Key images can be selected as a placeholder that will be replaced by images that are selected as key images of the study. For example, the $REPORT_BODY token will be replaced by the report text for the case when a report is entered. Besides the list of available tokens, one can include information in the report template from the DICOM header by using the DICOM group and element values in the format: $(xxxx,yyyy). For example, to include the "Requesting Physician" from the DICOM header in a report template one would use. $(0032,1032) Tag information can be found by right clicking on a case on the worklist, selecting "Tools" and then "View DICOM header"
Images (Imaging facility logos)
Images can be uploaded for use within templates. In order to upload an image click on the button labeled “Template Images” on the templates tab. This will open a file explorer that enables file management.
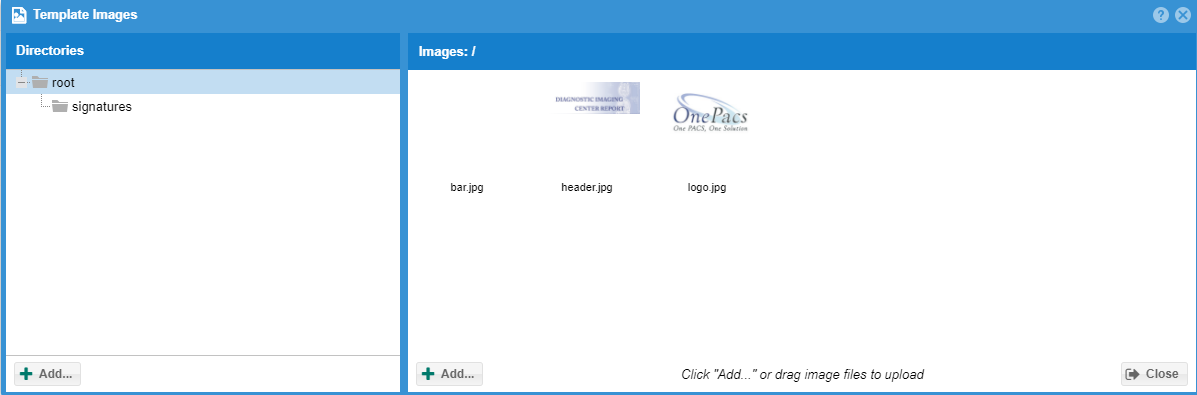
From this window you can right click on folder or files to manage them. Click the add button on the folders panel to add a new folder. Click the “Add” button on the images panel to show a local file explorer and allow a file to be uploaded. The image file name should not contain spaces. If the template image manager is launched from the report template page, you may double click an image to insert it into the report template.
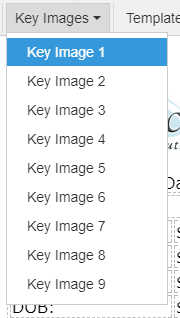
Key images
Key images, as selected for a given study from within the OnePacs Diagnostic Workstation, may be inserted into reports by selecting a key image placeholder from the key images dropdown menu:
Key images are represented in the report template by a standardized placeholder image (which happens to be an image of an axial CT through the chest). In actual reports, these placeholder images will be replaced by the actual selected key image(s) for the case in question. (If no key images exist for the case, the key image placeholders in the report template will be ignored and nothing will display in their place.)
The following screenshot demonstrates two key image placeholders within a report template:
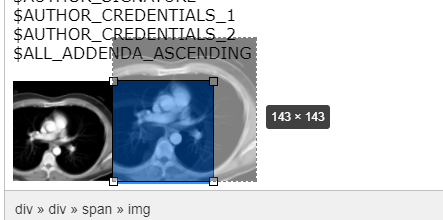
The key images will display at whatever size/magnification desired. The following screenshot demonstrates manual adjustment of the size of the one of the two key image placeholders. In reports using this template, the key image(s) will display at the actual sizes configured in the report template:
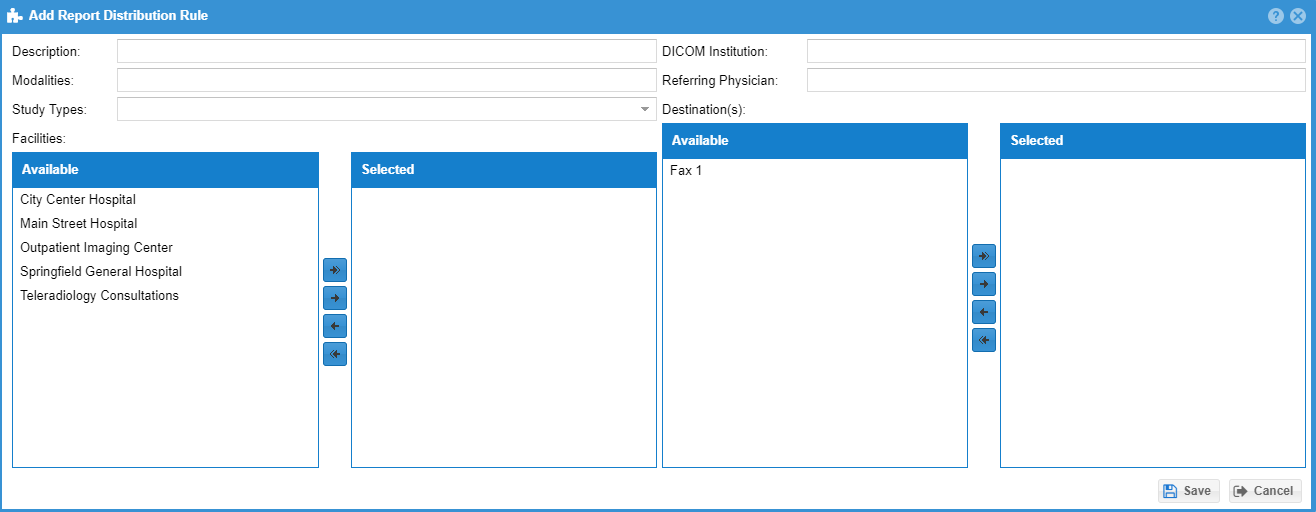
Report destinations and distribution rules
Report destinations are configured to where and how the report should be delivered. Distribution rules are used to configure when a particular destination should be used. For example, a report destination configure a facsimile destination at the phone number 15555555555. A distribution rule would configure that all reports from facility B should be sent to that facsimile when the report is completed.
Report destinations and distribution rules may be created or edited by selecting the “Report distribution” option from the “Admin” menu in OnePacs.
Creating Report destinations
After clicking on the “Destinations” tab, you may create one or more destinations to which reports may be transmitted, either manually, or through automatic distribution rules.
Destination types currently include:
For free and subscribed versions of OnePacs:
- Emailed notifications of new available reports, with web links to open the reports in the OnePacs system
For subscribed versions of OnePacs:
- Full-text report emails (working with OnePacs to ensure secure delivery is necessary when patient health information is involved)
- Facsimile
- HL-7 distribution
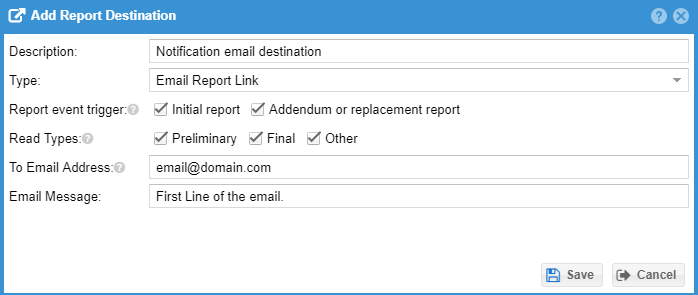
When creating a new reporting destination, a name for the report destination is first assigned, and a destination type is selected from a drop-down menu:
 Next, select if the destination is used for either the initial report or for addenda. Typically both should be selected.
To create an emailed report link destination, for example, two parameters are set: The destination email to which the report should be sent, and a customized first line for the report link email.
Report destination types
Emailed report notifications
Email report links send a HIPAA compliant email with links to view the study and the report with a OnePacs account. The recipient of the email receives notification of the patient's initials, age, examination type, study date and time, and performing imaging center.

Facsimile
Subscribed versions of OnePacs may establish facsimile numbers as destinations. When reports are transmitted by facsimile, faxes are transmitted direcly from dedicated fax servers in the OnePacs server cluster via the telephone network in a HIPAA-compliant fashion.
Full report emails
It is also possible to transmit full OnePacs reports to destination email addresses as an attachment. The attachments are in PDF format. This is for research and educational use where it may be acceptable to transmit reports through regular, unencrypted channels. For clinical use, use of the full-report email feature should be coordinated with OnePacs to ensure secure, regulatory-compliant email transmission.
Email-to-fax solutions
By combining the full report email function with a third-party email service such as eFax, it is possible to transmit reports via facsimile without subscribing to the OnePacs report transmission by facsimile feature. (While it is possible to arrange a HIPAA-compliant fax-to-email solution for report transmission from OnePacs, the recommended solution is to subscribe to the locally hosted OnePacs facsimile transmission service.)
To send reports through fax-by-email with OnePacs, first, set the “From” email setting to your registered email address with the eFax service, or with the other email-to-fax service of your choice. The “From” email address is the means by which most fax-to-email services recognize the sender of the fax.
The destination should be in the following general format:
<country code><phone number>@<email to fax provider host name>
such as, in the case of sending a fax to 1-800-555-1212 through eFax:
HL7 integration
HL7 integration for direct report upload into medical information systems is available as a paid feature of OnePacs. Please contact OnePacs for further details.
Distribution rules
Distribution rules configure when a report destination should be used. If all the conditions configured in the destination rule are satisfied the destination will be preselected to be used. Otherwise, if the facility matches one of the selected facilities but other configurations are not satisfied, the selected destination will be available but not preselected when the study is either confirmed or a report is completed.