...
Administrators, radiology assistants, and facility managers may create users, delete users, assign system permissions and facility privileges to such users, and modify other properties of such users. Facility managers only have the ability to create facility users and other facility manager accounts for the facilities for which they have access. Radiology assistants must be granted the "Manage facility users" permission to allow them to manage facility users/managers within the facilities that they have permission.
...
Click the Admin -> Users menu option to manage users.
This will show a A list of users that can be managed will be displayed. This list can be filtered by entering a username. Other fields, such as email address, can also be selected and used to filter the list. Users can also filter by user type. Long lists of users are paged. Paging options exist on the bottom right of the users list. Deactivated users can be included by selecting the "Show Deactivated" checkbox.

New users may be added by clicking the “Add” button. Users created using the add button (that did not apply for their own account via the account request feature) will be emailed a generated password that will be required to be changed during their initial login.
You can also send out an invitation email or generate an account request URL by clicking on the arrow on the add button. The account request or invitation features are useful when many new accounts will be created (for example when a new facility starts using OnePacs) as the potential user will fill out most of the account information. The account is then approved and finalized by the administrator.
Once a new user is created by clicking the save button, an administrative user may select the user on the grid and test the user by using clicking the “Login as” button. This allows the administrative user to act as the created user and verify functionality.
Use the top tabs to approve or deny account requests, create or modify permission sets, configure user access filters, or set up user groups for sharing.
Existing users may be modified or deleted by selecting a user and clicking the “edit” or “delete” buttons.Users button or double clicking on the user on the list.
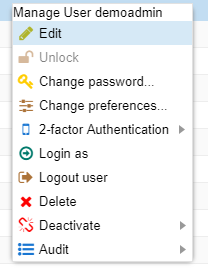
Users can be deleted by right clicking on the user and selecting "Delete" from the context menu.
Users that have created system resources such as study reports may not be deleted. Such users may instead be deactivated, if desired. Alternatively, such users may be deleted if those system resources which were created are first deleted.
...
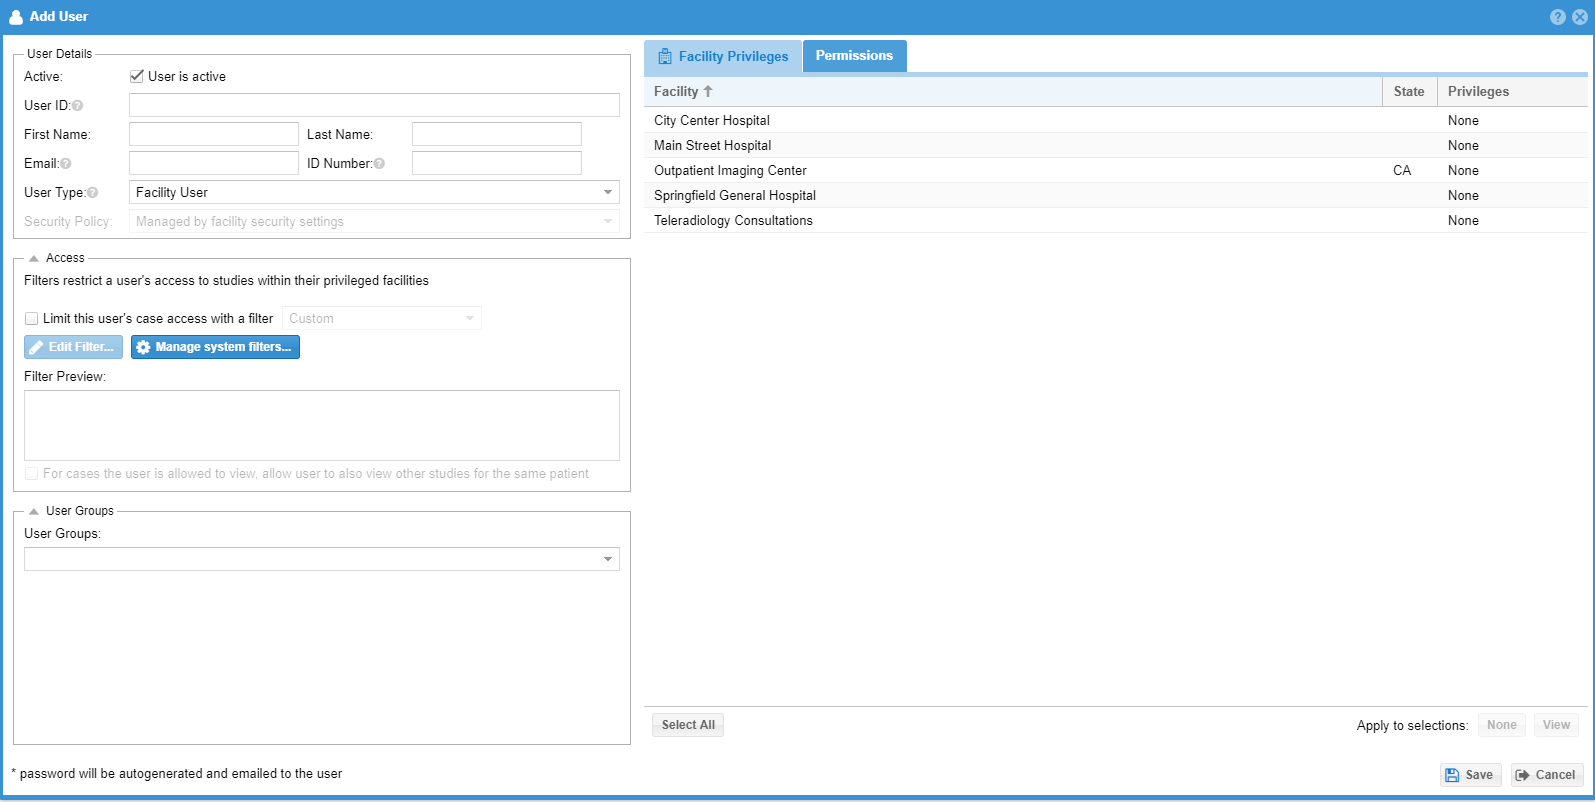
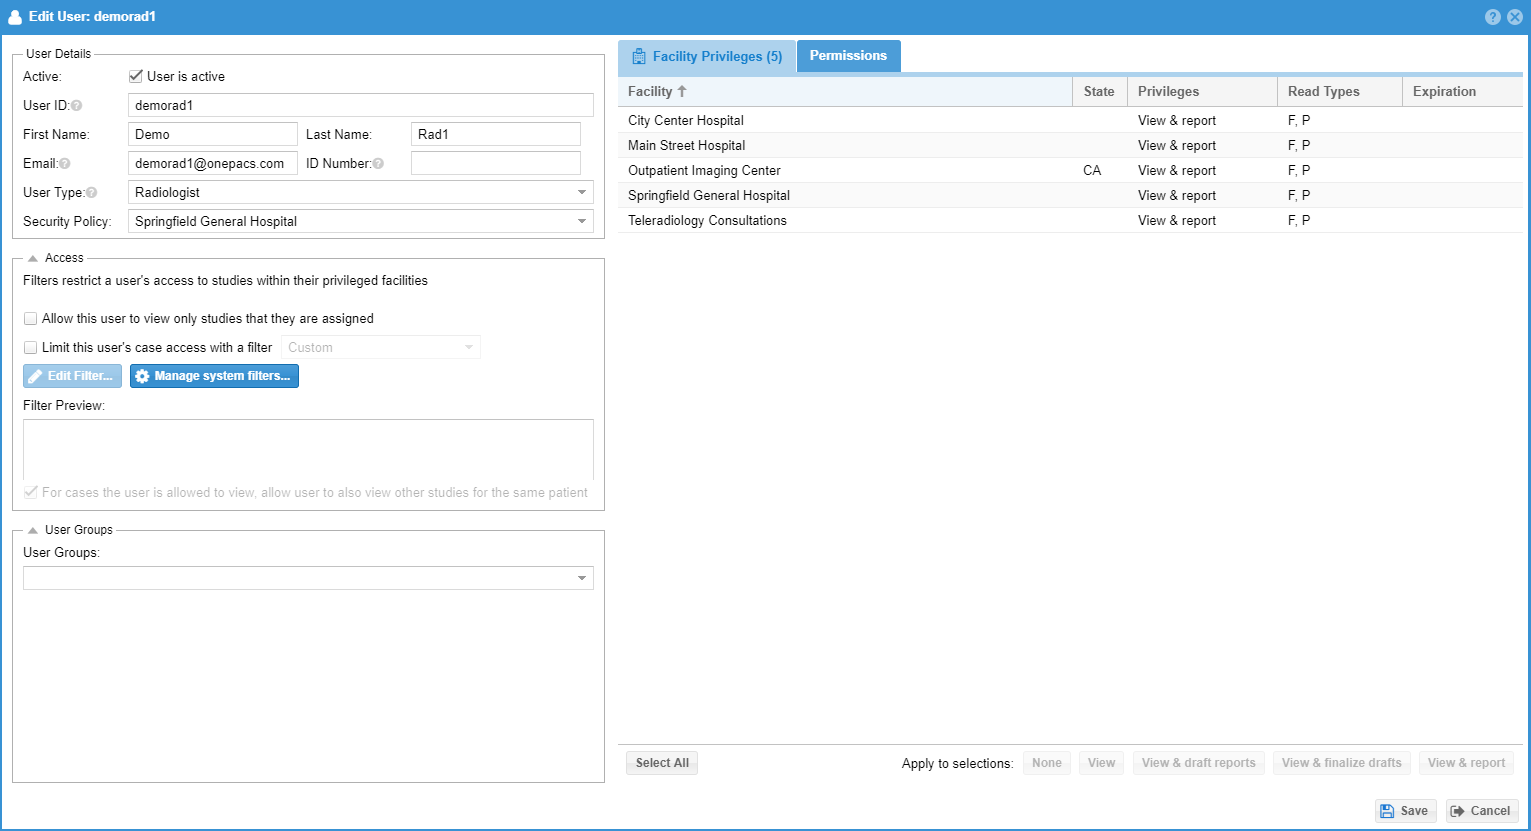
When creating a new user, or editing an existing user, a screen listing the properties of the user appears. This screen appears as follows:
The upper left portion of this window lists the user's username (which is not modifyable). Beneath this is the user's email address. To change user's password press the “Change Password” button on the bottom right of the screenright click on the user and select "Change Password" from the context menu. .
Setting Facility Privileges
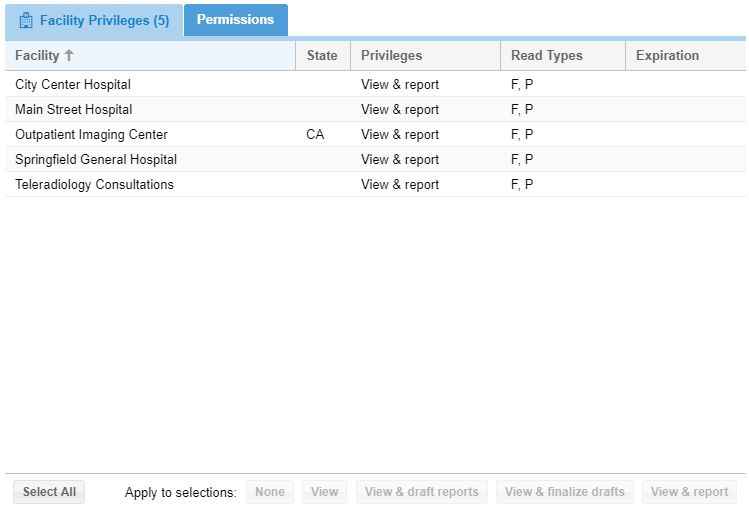
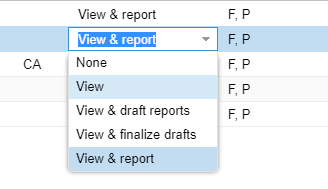
In the upper right hand corner of the user edit window, facility privileges are listed. The user's Facility Privileges may be modified using a pop-up menu of privileges, as shown:
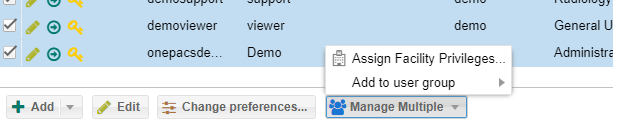
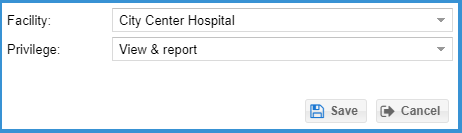
Administrators also have the ability to add or remove a facility privilege to multiple users. Use the checkboxes in the user grid to select multiple users. Click the "Manage Multiple" button followed by the "Assign facility privilegesFacility Privileges" button. Select the facility and the privilege to grant to each of the selected users. Select "None" to remove the privilege to the user. This is helpful when a new facility is added to the radiology group and many radiologists or many facility users might need a new facility privilege to either write or view reports.
Additionally, an expiration date for the privileges may be set by clicking in the “Expiration date” column. When the expiration date is passed, a "View & Report" privilege will be converted to "View & Draft" privilege.
User property tabs
The bottom portion of the user management screen offers several tabbed sections, as follows:
...
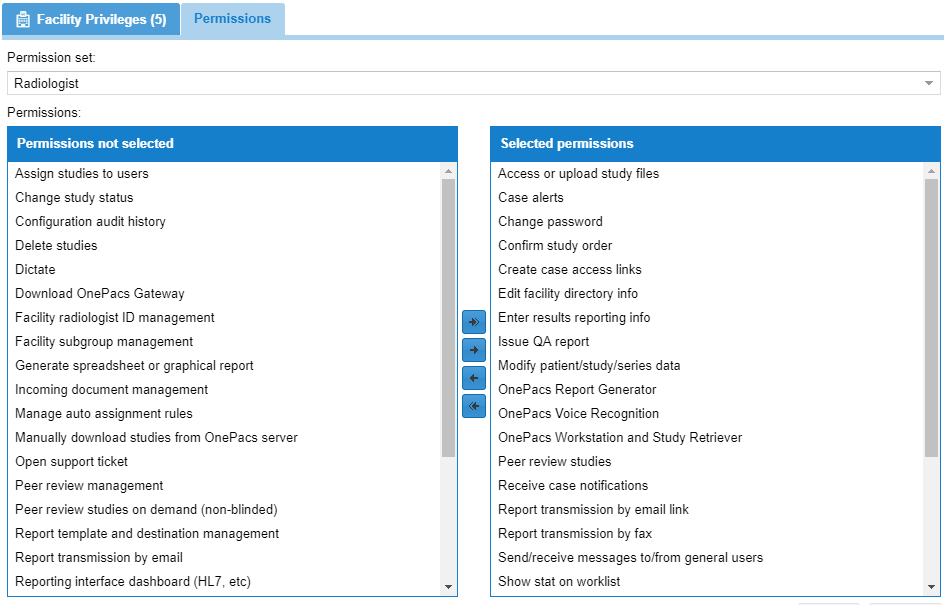
The permissions tab is used to control what features of the OnePacs system the user will have access to. These may be assigned to or removed from users one by one. Permissions listed in the right hand column are assigned to the user; permissions listed in the left hand column are not assigned to the user. Some permissions may automatically select other permissions as the permission may have dependencies. For example in order to create a case access link you must be able to view studies. Thus, selecting the role for “Create case access links” will automatically select the “View studies” role. Some permissions are restricted to certain user types.
As specific types of users (such as Administrators, ER physicians, radiologists, and transcriptionists) will common be assigned the same or similar sets of permissions, it is also possible to set up and apply pre-defined permission sets to users, to avoid having to select specific sets of permissions repeatedly.
Such permission sets may be established and edited by selecting the “Permission set” tab under the “Admin->Users” menu. Note that permission sets that include permissions that a certain user type may not have will not show in the list. For example, a facility user may not have the peer review permission and therefore any permission sets that contain the peer review permission will not show for a facility user.
The following screenshot demonstrates application of a permission set to a user, through the permission set drop-down menu:

Preferences
...
The preferences tab provides access to those user-specific settings that may User preferences can be modified by the user in question (as long as the user has the “User preferences” permission). The selections made by the user may be viewed or modified using this tab. selecting a user and clicking on the "Change Preferences" button. If the advanced worklist preference is unchecked the user will only be presented with a single worklist search tab and the user will not be able to persist changes to their worklist configuration. This may be useful for technicians at imaging facilities that do not need the flexibility of the advanced worklist.

...
The Groups tab allows users to be placed into or removed from “user groups”. User groups are defined sets of users, for use in conveniently sharing, or un-sharing, system resources, such as access to shared folders.
In the following screenshot, a single group, entitled “Test”“Group1”, has been created. The user is not a member of this group. You can quickly include multiple users into an existing user group by selecting multiple users on the users list and then selecting "Manage" followed by "Add user to group"

...