The endoscopy viewer displays a volumic reconstruction of the dataset, like the volume rendering viewer. However, the camera settings are adjusted for a wider angle lens, to be positioned inside the volume, instead of a normal lens that looks at the volume from the outside.
Graphic User Interface
The viewer is split into four views. Three of these are actually a 2D MPR viewer: their purpose is to facilitate the navigation of the dataset, so that you can more easily position the endoscopy camera. The resulting reconstruction is displayed in the fourth view.
The Toolbar
The viewer toolbar provides access to tools and functions that interact with the displayed dataset or with the viewer interface.
This toolbar can be customized just like the database window toolbar, but with other available items, which are reviewed in this section.
 3D Tools
You can use this item to choose the mouse interaction effect for the left mouse button in the endoscopy view. By clicking on one of these buttons, you select the corresponding tool.
The following tools are available: WL/WW, Pan, Zoom, Rotate, Revolve, Tilt and Point.
 MPR Tools
You can use this item to choose the mouse interaction effect for the left mouse button in the MPR views. By clicking on one of these buttons, you select the corresponding tool.
The following tools are available: WL/WW, Pan, Zoom, Rotate, Scroll, Length, Oval, Angle and Pointer.
 3D Adjustments
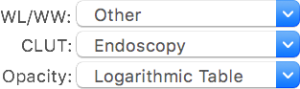
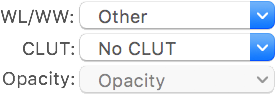
Through this item you define how to display the render data. You may adjust the used WL/WW, CLUT and opacity table: just like in the 2D viewer, the presented pop-up buttons list the available presets.
 MPR Adjustments
Through this item you define how to display the slice data in the MPR views. You may adjust the used WL/WW, CLUT and opacity table: just like in the 2D viewer, the presented pop-up buttons list the available presets.
 Export
This button allows you to store the current reconstruction as a new DICOM series. A dedicated interface is displayed so you can set several options for the dataset creation: a series name, what range to export and more.
 Fly-Through
This button displays the Fly-Through panel, allowing you to create a camera path that you can use to create an animated series.
In this panel you can add, edit and delete any number of key positions, and reorder them. You can also save the key positions list to disk, as an XML file, and load them back. You also have many additional options to interpolate the defined key positions into the final path.
 Engine
This button lets you choose what rendering pipeline is used: wither the main processing unit or the dedicated graphics processing unit. Results may vary slightly, but using the GPU should allow for much faster renders.
 Shading
You may use this item to access the shading options used to render the volume.
 LOD
LOD
This item allows you to specify the level of detail used to render the volume. This may come useful if the viewer is too slow on your workstation: by using a more coarse setting, it will take less time to render by reducing the number of raytracing rays.
 Path Assistant
The path assistant tries to define a path from the two input points. It uses an automated path-finding algorithm to add intermediate points that follow the anatomy in the dataset. The input points should be the two extremes.
Other Functions
The endoscopy viewer also responds to the Email option available in the File menu. This function captures the current reconstruction as a JPEG image and transfers this file to the Mail app, attached to a new email message.