Creating or managing users
Click the Admin -> Users menu option to manage users.
A list of users that can be managed will be displayed. This list can be filtered by entering a username. Other fields, such as email address, can also be selected and used to filter the list. Users can also filter by user type. Long lists of users are paged. Paging options exist on the bottom right of the users list. Deactivated users can be included by selecting the "Show Deactivated" checkbox.
New users may be added by clicking the “Add” button. Users created using the add button (that did not apply for their own account via the account request feature) will be emailed a generated password that will be required to be changed during their initial login.
You can also send out an invitation email or generate an account request URL by clicking on the arrow on the add button. The account request or invitation features are useful when many new accounts will be created (for example when a new facility starts using OnePacs) as the potential user will fill out most of the account information. The account is then approved and finalized by the administrator.
Once a new user is created by clicking the save button, an administrative user may select the user on the grid and test the user by using clicking the “Login as” button. This allows the administrative user to act as the created user and verify functionality.
Use the top tabs to approve or deny account requests, create or modify permission sets, configure user access filters, or set up user groups for sharing.
Existing users may be modified by selecting a user and clicking the “edit” button or double clicking on the user on the list.
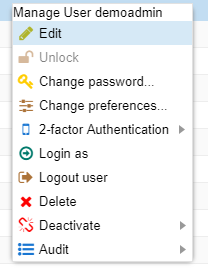
Users can be deleted by right clicking on the user and selecting "Delete" from the context menu.
Users that have created system resources such as study reports may not be deleted. Such users may instead be deactivated, if desired. Alternatively, such users may be deleted if those system resources which were created are first deleted.
User Types
User types help define what functions a user may perform. Some permissions are automatically excluded when various a user type is selected. For example, a facility user is excluded from having certain administrator permissions.
| User Type | Explanation |
| Facility User | Typically a user from an imaging facility. This type of user may be managed by facility managers |
| Facility Manager | Typically a user from an imaging facility. This type of user may create new facility users and other facility managers |
| Transcriptionist | An individual responsible for transcribing audio dictations from a radiologist. |
| Radiology Assistant | An individual responsible for administrative tasks such as results reporting, communicating with personnel at imaging facilities, possibly assigning cases. |
| Radiologist | A physician responsible for providing clinical interpretation of imaging exams. |
| General User | A general user such as a user responsible for generating billing reports. |
| Limited Administrator | An administrator with some limitations. This user cannot manage Admin users and are limited to the permissions they are granted. |
| Admin | An administrator for then entire group. |
Modifying user properties
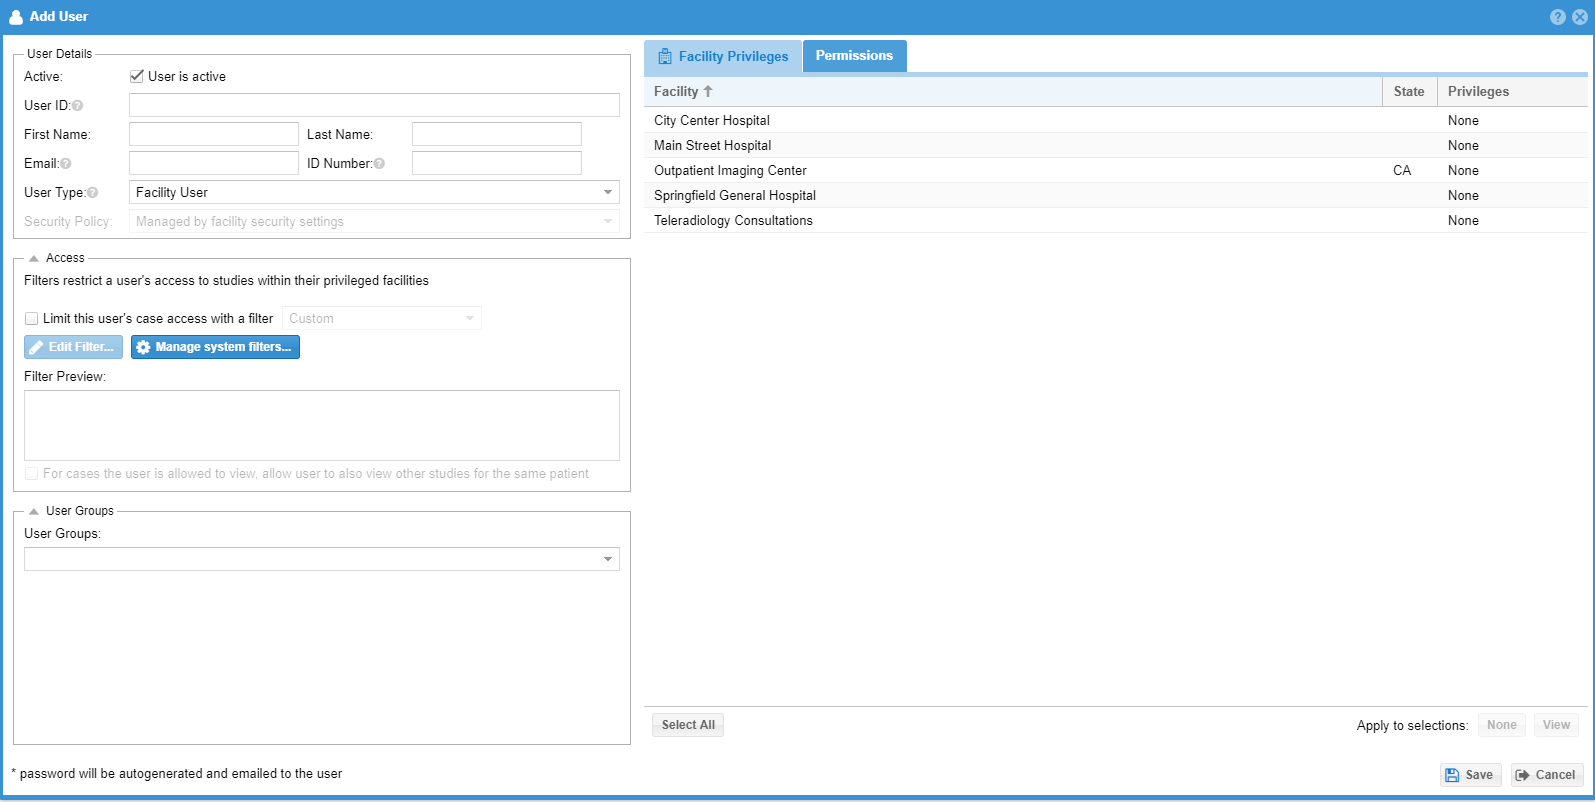
When creating a new user, or editing an existing user, a screen listing the properties of the user appears. This screen appears as follows:
The upper left portion of this window lists the user's username (which is not modifyable). Beneath this is the user's email address. To change user's password right click on the user and select "Change Password" from the context menu. .
Setting Facility Privileges
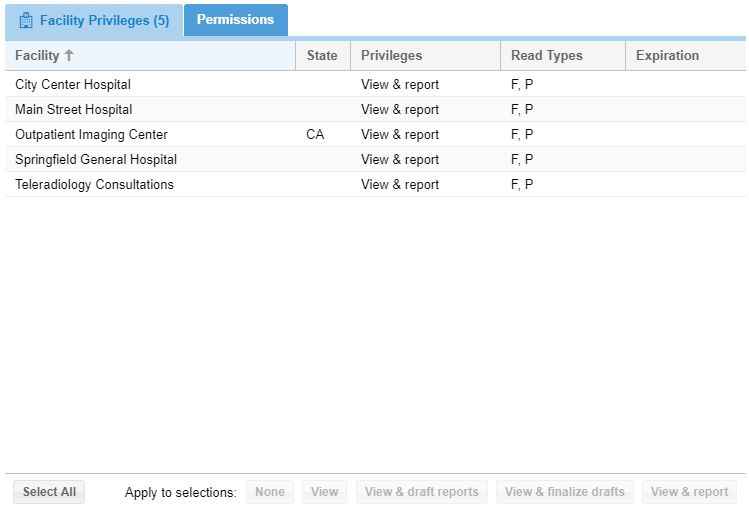
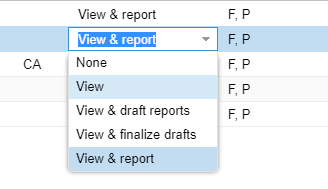
In the upper right hand corner of the user edit window, facility privileges are listed. The user's Facility Privileges may be modified using a pop-up menu of privileges, as shown:
If your group has many facilities you can search for a specific facility
Administrators also have the ability to add or remove a facility privilege to multiple users. Use the checkboxes in the user grid to select multiple users. Click the "Manage Multiple" button followed by the "Assign Facility Privileges" button. Select the facility and the privilege to grant to each of the selected users. Select "None" to remove the privilege to the user. This is helpful when a new facility is added to the radiology group and many radiologists or many facility users might need a new facility privilege to either write or view reports.
Additionally, an expiration date for the privileges may be set by clicking in the “Expiration date” column. When the expiration date is passed, a "View & Report" privilege will be converted to "View & Draft" privilege.
User property tabs
The bottom portion of the user management screen offers several tabbed sections, as follows:
Permissions tab
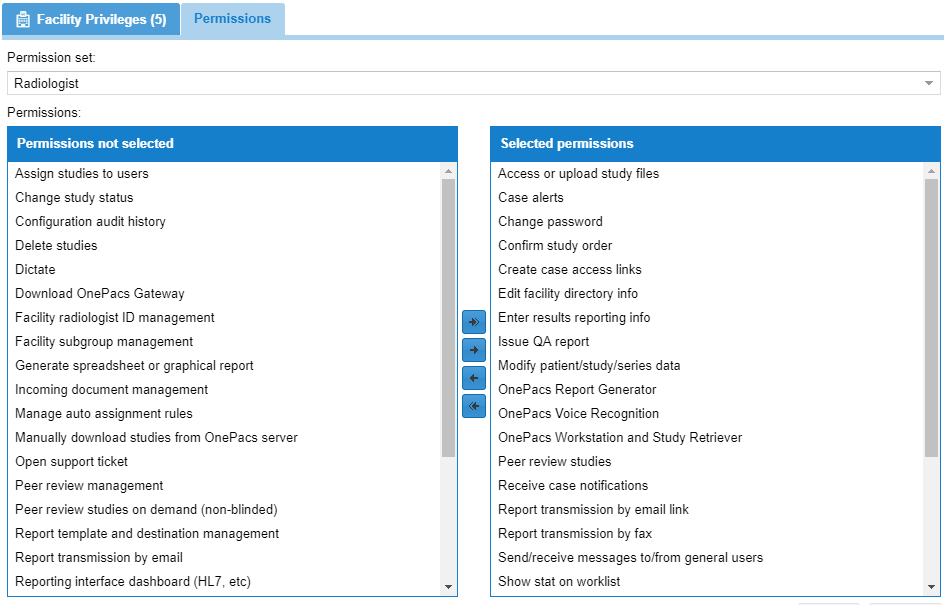
The permissions tab is used to control what features of the OnePacs system the user will have access to. These may be assigned to or removed from users one by one. Permissions listed in the right hand column are assigned to the user; permissions listed in the left hand column are not assigned to the user. Some permissions may automatically select other permissions as the permission may have dependencies. For example in order to create a case access link you must be able to view studies. Thus, selecting the role for “Create case access links” will automatically select the “View studies” role. Some permissions are restricted to certain user types.
As specific types of users (such as Administrators, ER physicians, radiologists, and transcriptionists) will common be assigned the same or similar sets of permissions, it is also possible to set up and apply pre-defined permission sets to users, to avoid having to select specific sets of permissions repeatedly.
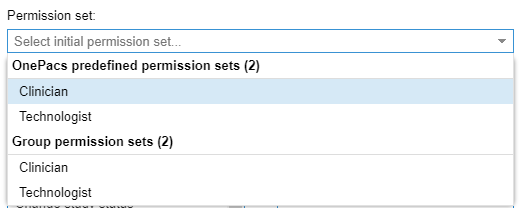
Such permission sets may be established and edited by selecting the “Permission set” tab under the “Admin->Users” menu. Note that permission sets that include permissions that a certain user type may not have will not show in the list. For example, a facility user may not have the peer review permission and therefore any permission sets that contain the peer review permission will not show for a facility user.
The following screenshot demonstrates application of a permission set to a user, through the permission set drop-down menu:
Preferences
User preferences can be modified by selecting a user and clicking on the "Change Preferences" button. If the advanced worklist preference is unchecked the user will only be presented with a single worklist search tab and the user will not be able to persist changes to their worklist configuration. This may be useful for technicians at imaging facilities that do not need the flexibility of the advanced worklist.
Access tab
The access tab provides a means of restricting users' access to cases using filters. For example, radiologists might be filtered (as below) to only be able to access cases that they are assigned, but also have access to prior cases for the same patient. Custom and system filters can be used to also further restrict access. For example, a specialized radiologist may be restricted to only see mammography cases, or an ordering physician may be restricted to see only cases that he or she refer. Examples of how to do this are provided in the documentation section regarding case access management.
Report Authoring Restrictions
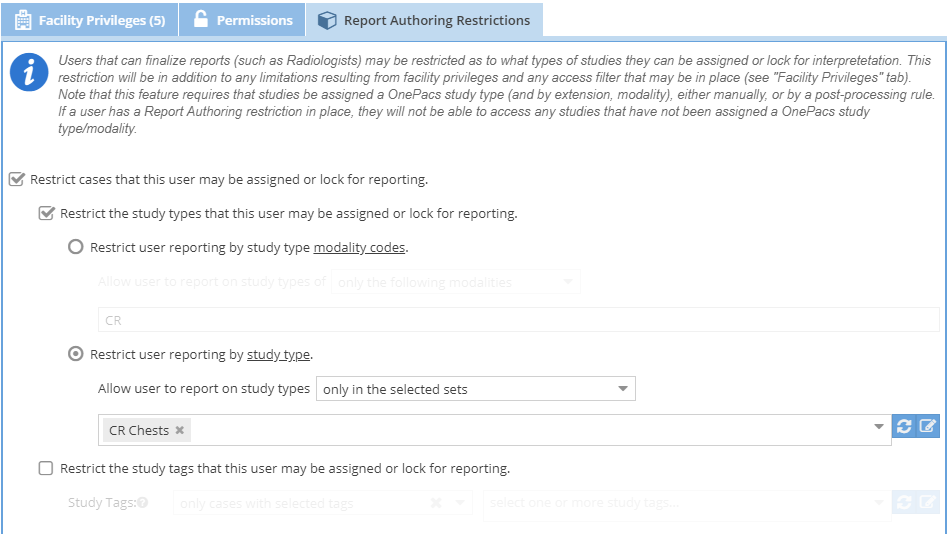
Users that can author a report (with draft of higher) can be restricted on what reports they may write by study type. Click the "Report Authoring Restrictions" tab and enter a comma separated list of study type modalities or select one or more study type sets to control what the report author may write. Configurations can be set to either include or exclude and can be quickly turned off by unchecking the restriction checkbox. For exclusion, if any study type match or modality that is excluded the case cannot be assigned. For inclusion, if the case is assigned any of those study types the case may be assigned.
Study tags can also be included or excluded. One key difference between study tag and study types is that a study that does not have a study tag can still be assigned. Study tags can be assigned manually or via post processing.
Note, this workflow requires the case to be assigned a study type before an author will have reporting access to the case. Study types can be assigned via study confirmation, HL7 orders, or postprocessing. When using this feature with auto assignment it is recommended to remove the In transmission status from the auto assignment rule so that the study is fully processed before attempting to assign the case so that a study type is given to the case.
Groups tab
The Groups tab allows users to be placed into or removed from “user groups”. User groups are defined sets of users, for use in conveniently sharing, or un-sharing, system resources, such as access to shared folders.
In the following screenshot, a single group, entitled “Group1”, has been created. The user is a member of this group. You can quickly include multiple users into an existing user group by selecting multiple users on the users list and then selecting "Manage" followed by "Add user to group"
Facility User Managers
At times it may be useful for facilities to manage their own users. Creating a user that is a facility manager will allow the user to create new users (of user types facility manager and facility user) for the facilities they have access. Users they create will by default be facility users. Facility user managers can only give permissions that they have They may also only grant the view permission for reporting. To assist with user creation users may use the account request feature. Radiology assistants may also be granted the "Manage Facility Users" permission. With this permission they will have the ability to function as a facility manager for the facilities for which they have permission.
Deactivating Users
Users can be deactivated so that they are no longer able to login to the system.

