...
Images can be uploaded for use within templates. In order to upload an image click on the button labeled “Template Images” on the templates tab. This will open a file explorer that enables file management. From this window you can right click on the “Template Images folder” or another created folder to manage files. The right click context menu will give you the ability to create a new folder or to upload images to the selected folder. Click the “Add” button to show a local file explorer and allow a file to be queued for upload. The image file name should not contain spaces. Once the upload queue contains the desired images click the “upload” button to start the transfer. Double click on an image to open the image in a separate window. The URL of the image can be retrieved from the window. The image URL will be need to insert the image in a template.
When editing a template use the "Insert" and "Insert Image" menu options to insert an image. Paste or type the image URL that was copied above as the source of the image. Click the “insert” button to insert the image to the current cursor location. External (to the OnePacs System) fully referenced images should be avoided, especially when the image is not available via HTTPS.
Key images
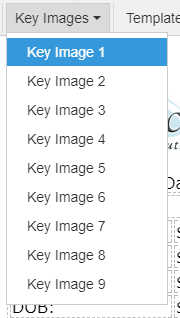
Key images, as selected for a given study from within the OnePacs Diagnostic Workstation, may be inserted into reports by selecting a key image placeholder from the key images dropdown menu:
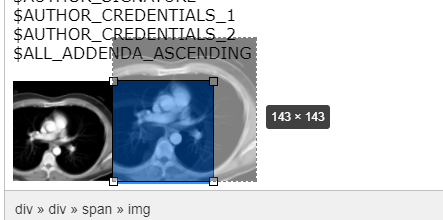
Key images are represented in the report template by a standardized placeholder image (which happens to be an image of an axial CT through the chest). In actual reports, these placeholder images will be replaced by the actual selected key image(s) for the case in question. (If no key images exist for the case, the key image placeholders in the report template will be ignored and nothing will display in their place.)
The following screenshot demonstrates two key image placeholders within a report template:
The key images will display at whatever size/magnification desired. The following screenshot demonstrates manual adjustment of the size of the one of the two key image placeholders. In reports using this template, the key image(s) will display at the actual sizes configured in the report template:
...
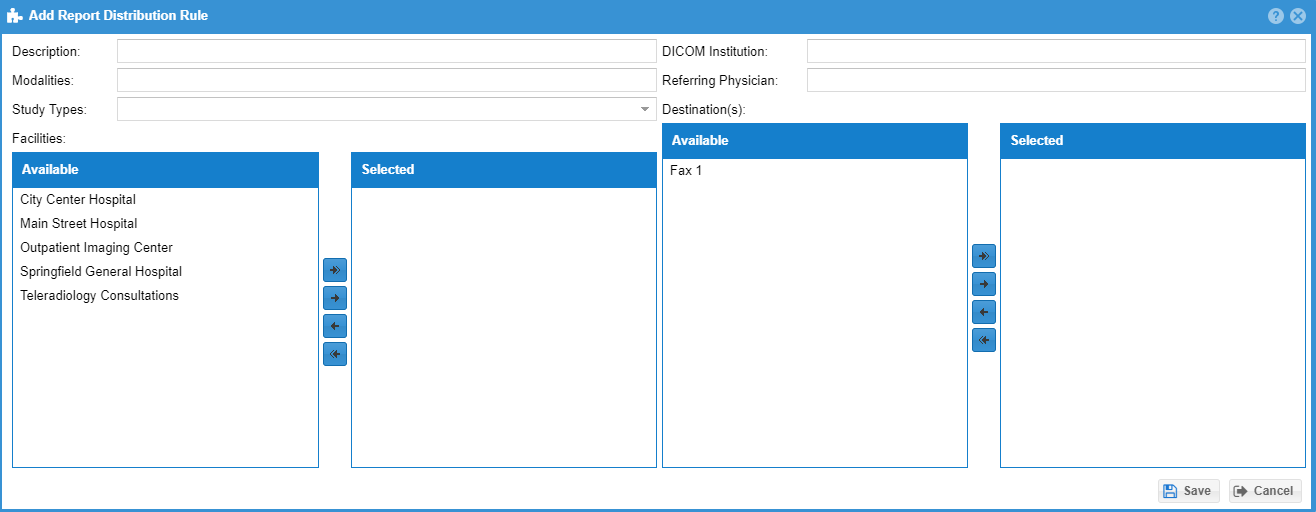
After clicking on the “Destinations” tab, you may create one or more destinations to which reports may be transmitted, either manually, or through automatic distribution rules.
Destination types currently include:
For free and subscribed versions of OnePacs:
- Emailed notifications of new available reports, with web links to open the reports in the OnePacs system
For subscribed versions of OnePacs:
- Full-text report emails (working with OnePacs to ensure secure delivery is necessary when patient health information is involved)
- Facsimile
- HL-7 distribution
When creating a new reporting destination, a name for the report destination is first assigned, and a destination type is selected from a drop-down menu:

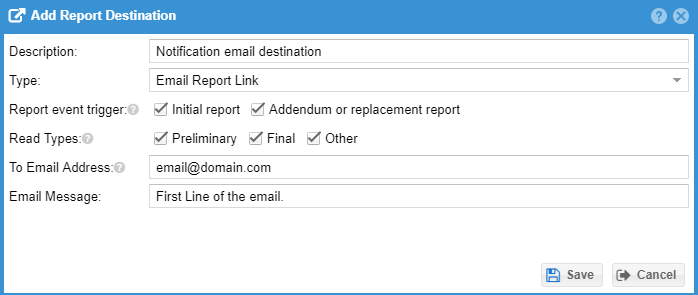
 Next, select if the destination is used for either the initial report or for addenda. Typically both should be selected.
To create an emailed report link destination, for example, two parameters are set: The destination email to which the report should be sent, and a customized first line for the report link email.

Report destination types
Emailed report notifications
...
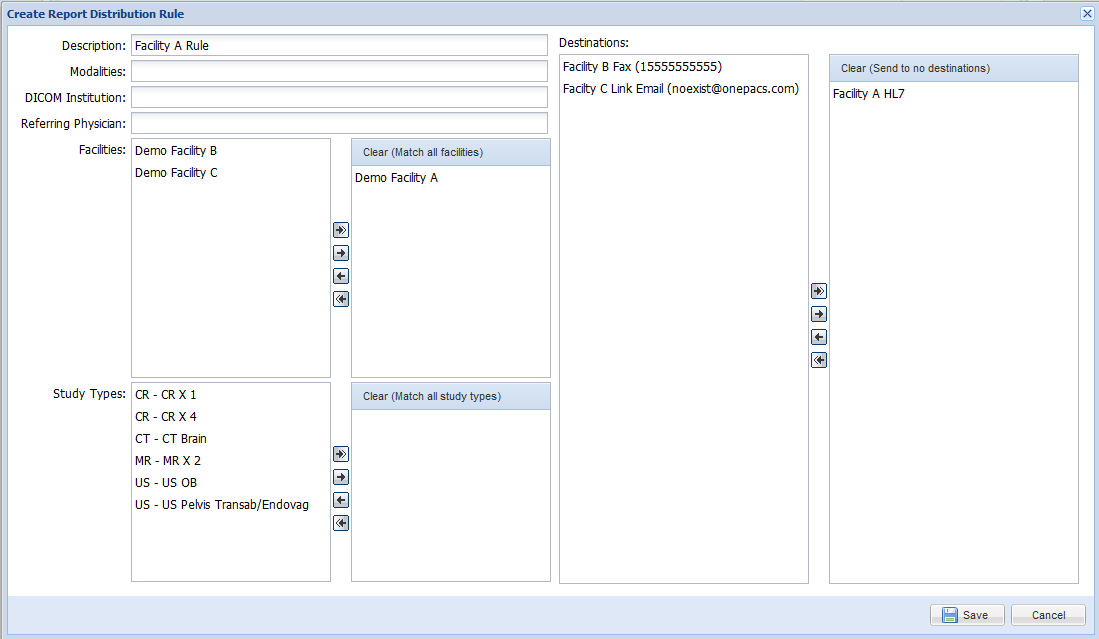
Distribution rules configure when a report destination should be used. If all the conditions configured in the destination rule are satisfied the destination will be preselected to be used. Otherwise, if the facility matches one of the selected facilities but other configurations are not satisfied, the selected destination will be available but not preselected when the study is either confirmed or a report is completed.